Wrist & Hand Exercises
General
These exercises are repeated 10 times each , approximately 3-4 times / day.
It is easy to perform them in the shower or after wrapping the arm & hand in a warm towel for a few minutes.
If you experience swelling of the hand or wrist at the end of an exercise session then apply a bag of ice wrapped in a tea towel at this time for 5-10 mins.
After a wrist fracture you should avoid lifting hot or heavy objects or returning to sport for at least 6 weeks after the plaster is removed.
Writing or washing up is usually not a problem.
You should not return to driving before you would be able to turn the steering wheel in an emergency to save yourself or someone else. More Information
Start the exercises gently because the wrist is often irritable when it first comes out of plaster.
An "Active exercise" is where you use your own muscles to move a joint
A "Passive exercise" is where you apply force to a joint using external force eg from the other hand or leaning against an object or when a physiotherapist is stretching a joint for you.
In General we start with active exercises first to regain range of motion and then add passive exercises later when the fracture has solidly healed.
In general a prolonged gentle stretch is better than sudden forceful movements.
1. Wrist back & Forwards ( " Dorsiflexion & Palmarflexion")
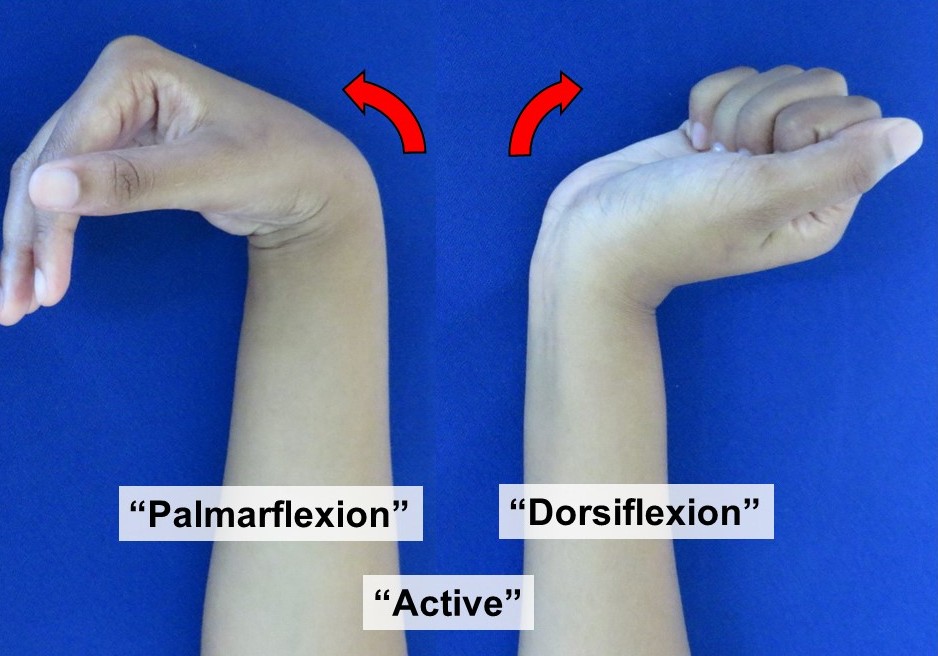
Support your forearm. Without forcing it move your wrist as directed as far as you can without causing pain.
2. Wrist Side to Side ( "Radial & Ulnar deviation")
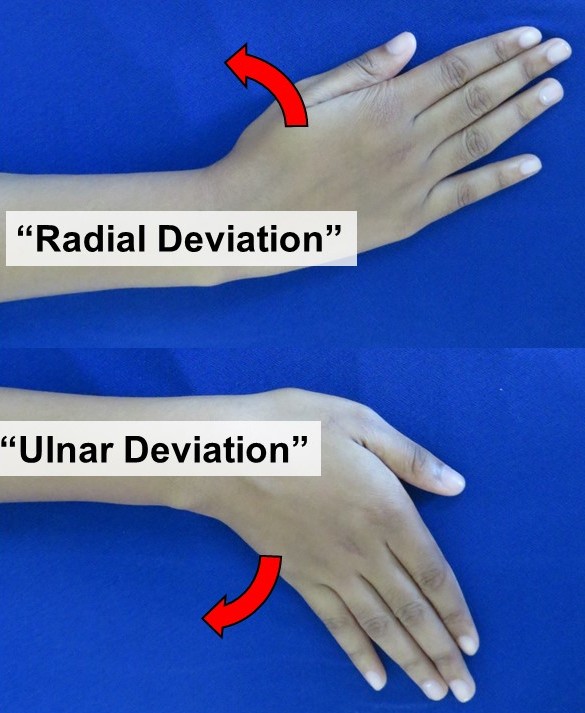
Rest your forearm on a table with your thumb pointing to the ceiling. Move the wrist up & down.
3. Forearm Rotation ( "Pronation & Supination")
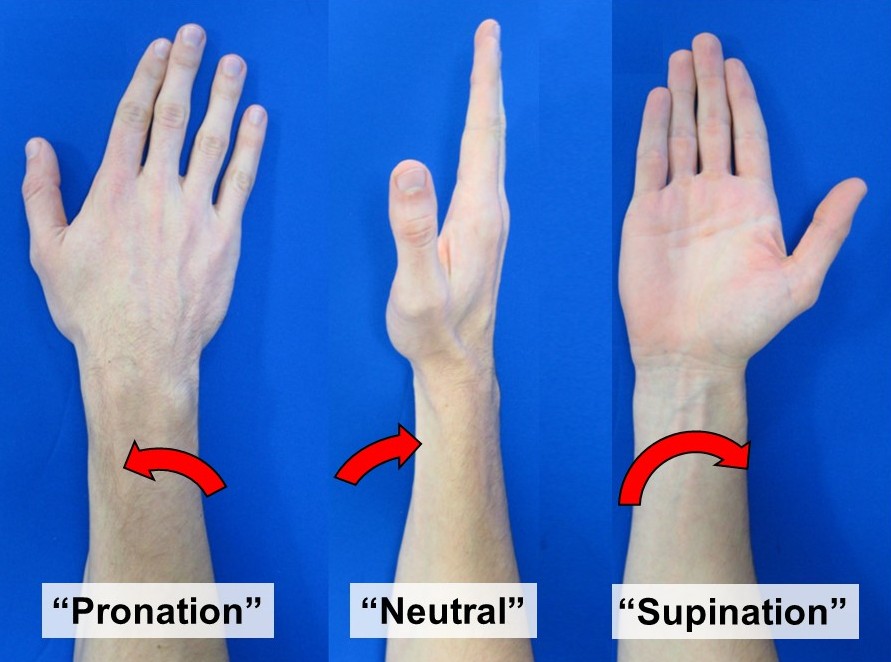
Tuck you elbow against your side. Turn your palm up to the ceiling then down to the floor.
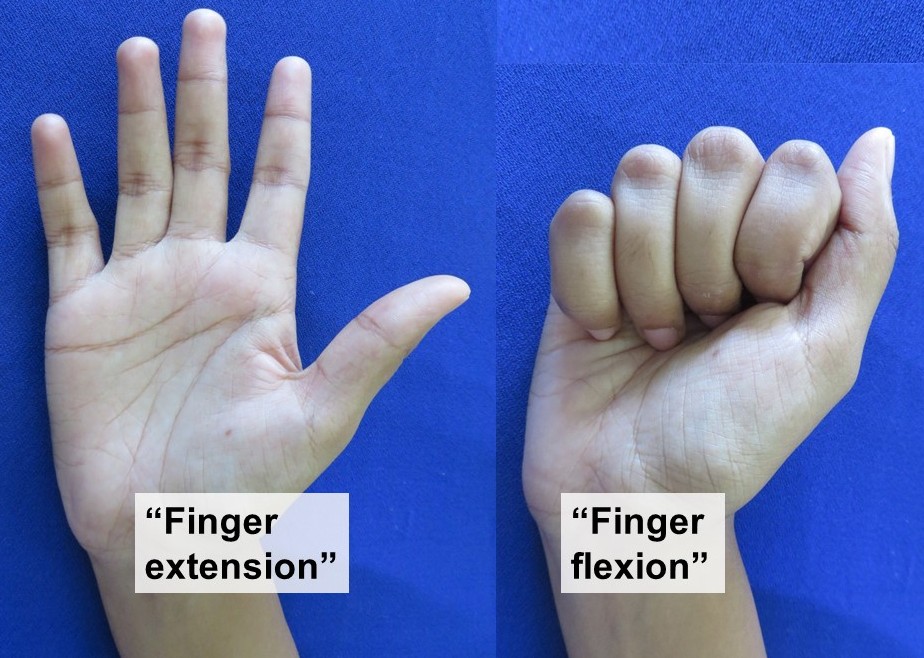
4. Making a fist.
5. Knuckle bends
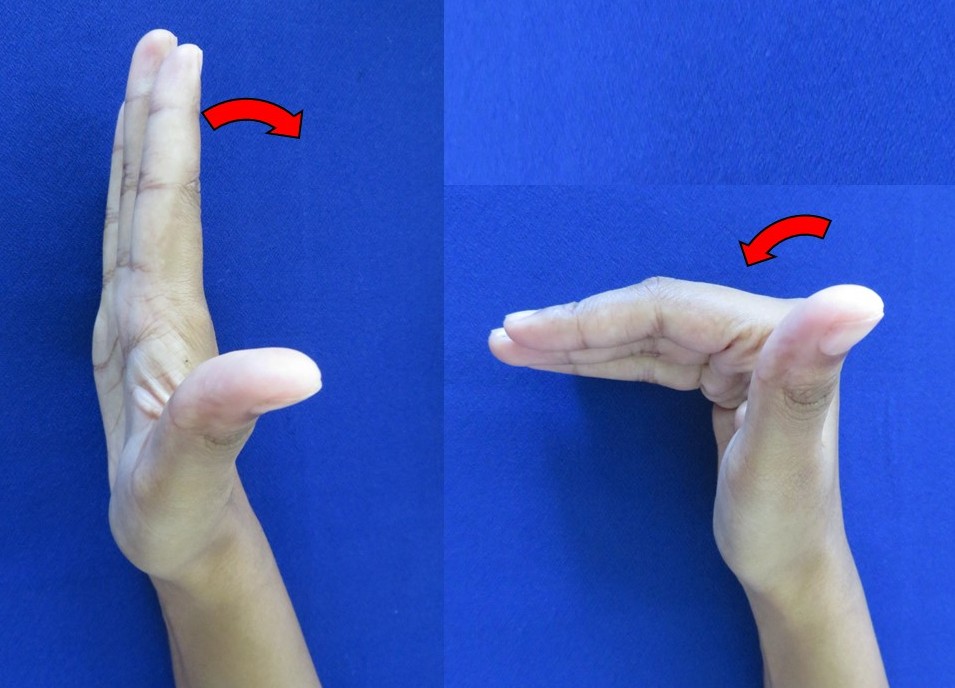
Keep your fingers straight. Bend your fingers 90 degrees at the knuckles then fully straighten the fingers.
6. Thumb
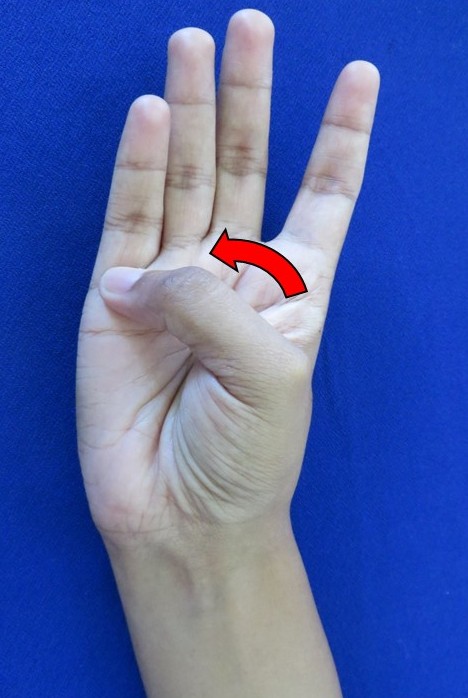
Touch your thumb to each finger in turn then stretch out into “hitch hiking” position.
Aim to place the thumb as low down the finger as possible.
Stage 2
After about 2 weeks ( Confirm this with your surgeon or therapist) you can gradually increase the force applied to the wrist to further increase the movement.
Note you should still avoid sport & heavy lifting.
7. Wrist Stretch Backwards ( "Passive Wrist Dorsiflexion")
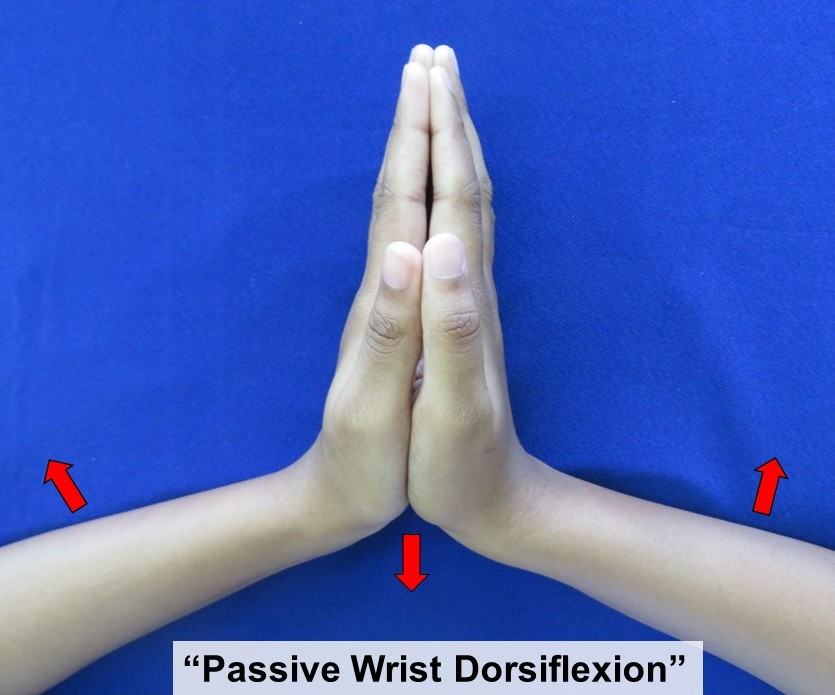
Sit with elbows on a table & palms together.
Lower your wrists to the table until you feel a stretch & hold this for 5 seconds.
Note you must keep your palms together.
8. Wrist Stretch Forwards ( "Passive Wrist Palmarflexion")
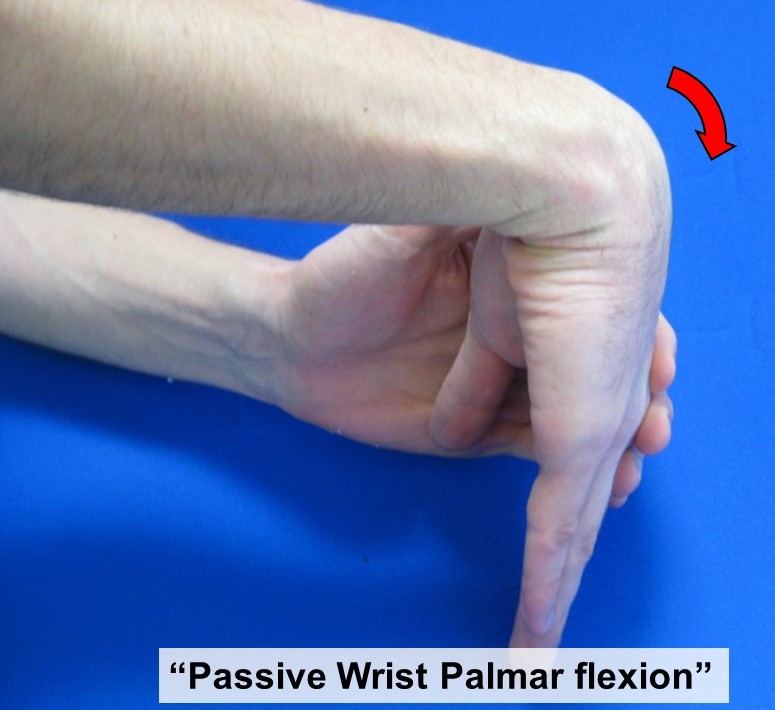
Keeping your elbow straight , bend your wrist down until a stretch is felt & hold again.
Add some pressure with your other hand.
9. Wrist Stretch with Elbows straight
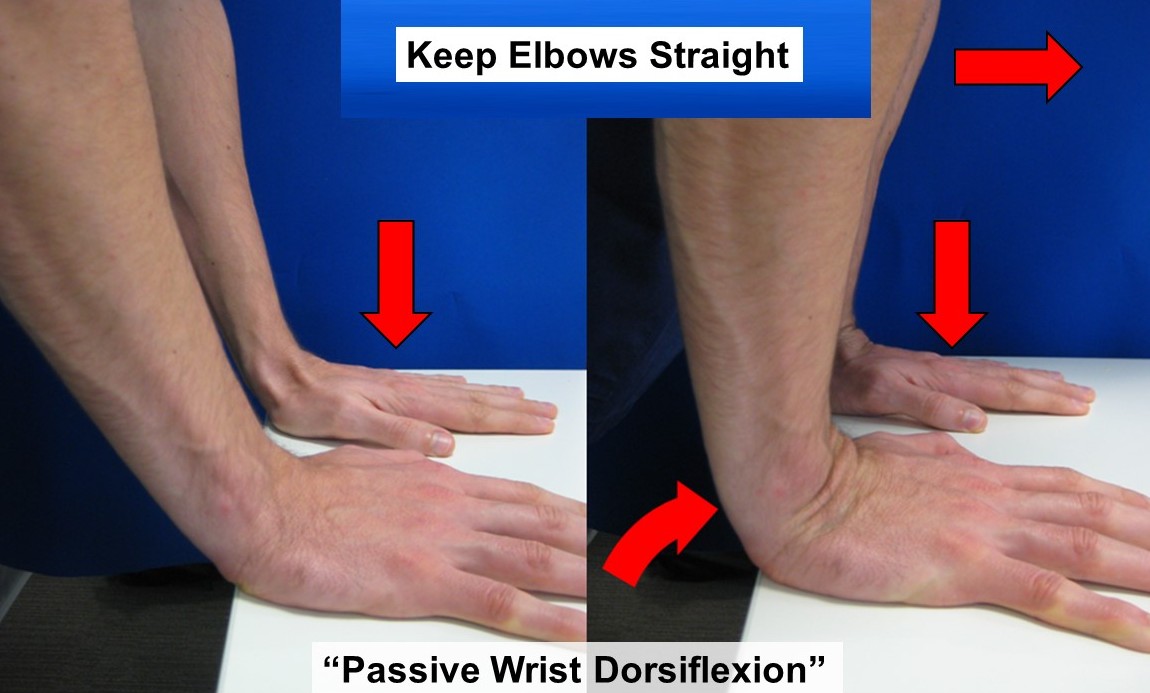
Place arms on a table.
Move your body over your hands until you feel a comfortable stretch in your forearms.
Hold for 5 seconds.
10. Grip Strengthening
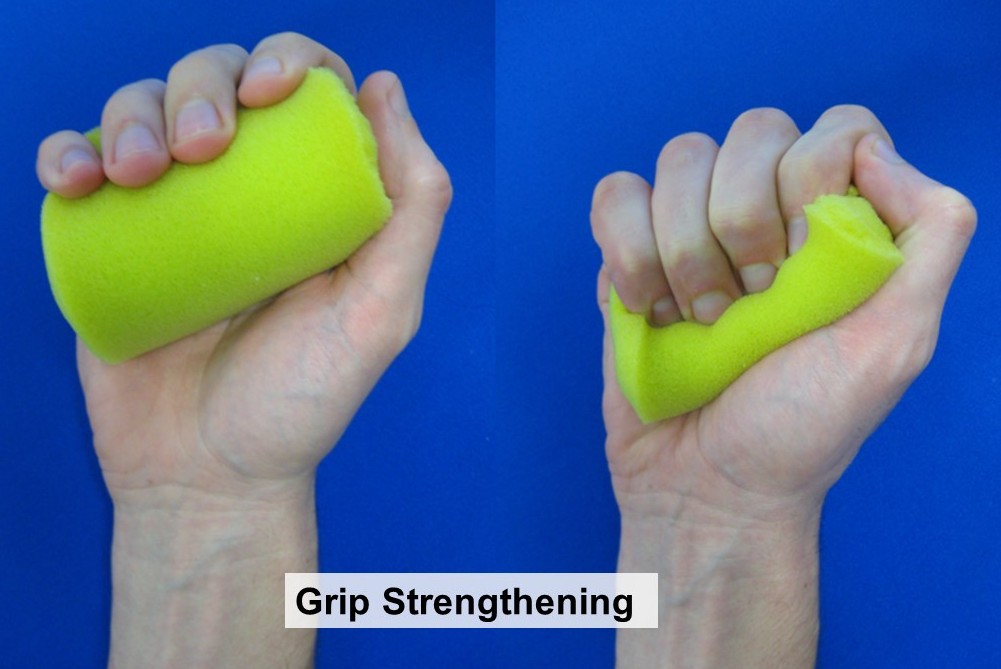
Squeeze a piece of play dough or plasticine .
Check that all fingers are leaving an impression in the dough.
Note:
It is far better to perform the exercises gently 4 times a day than to be very forceful once a day.
If your progress is slow you may benefit from expert advice & treatment from a Physiotherapist or Hand therapist.
A Summary of this sheet is available for regular review.
Revised 27/5/2020